Using the Query Wizard |
||
|---|---|---|
|
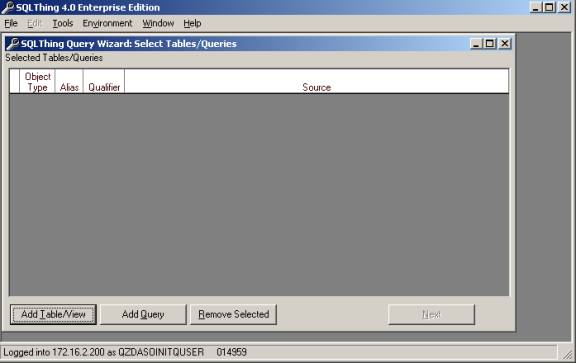
Once you start the query wizard, a screen similar to the one below is shown.
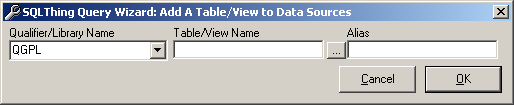
From this screen, you can specify the tables, views and queries that you want to use in the wizard to create a new SQL statement. Clicking Add Table/View causes the following screen to appear.
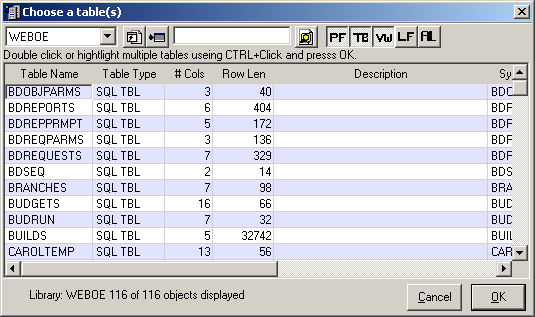
If you know the name of the Library and Table you want to use, you can type them into the appropriate fields or by pressing the ‘…’ button you can cause a screen like the one below to be displayed.
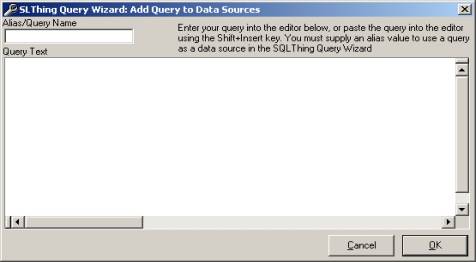
Double clicking on a table or view in this screen causes the library, table and alias to be automatically entered into the preceding screen. Note that from this screen, you can type a string into the search area and have SQLThing find a table containing that text in its description or name. You can also drop down the library list to choose a new library, or add a library to your library list using the button on the explorer bar that looks like a lightening bolt in a piece of paper. This screen is very similar to the Database Explorer interface; so see the Database Explorer documentation for more information on navigation options. Once you have selected a table, SQLThing will retrieve all of the columns for that table into local storage and make the next button available. At this time, you can go directly to the layout window or you can choose to add another table or query. Choosing the Add Query button brings up the following screen.
From this screen, you can type in or paste a query from the windows clipboard into the Query Text window and then give the query an Alias. The Alias will be used to refer to the query as if it is an existing table/view. Pressing OK causes the query to be compiled and tested. If there is an error in the query, SQLThing will show you the AS/400 error message. If the query is OK, the definitions of the query columns will be retrieved and you will be returned to the first query wizard screen. If you selected more than one table/query into the wizard, pressing Next will cause the Join screen to be displayed.
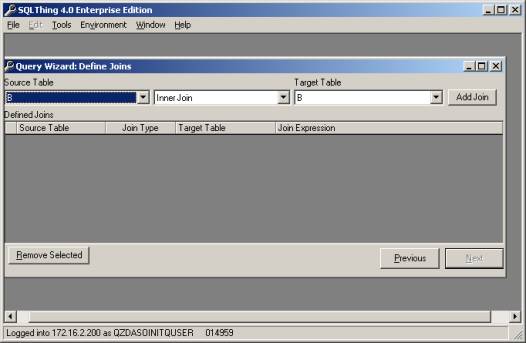
From this screen, you can specify how the tables/queries are to be joined. The drop down boxes on the left and right allow you to select which tables you want to join. Note that the table Aliases are displayed in the drop downs, not the full table names. The drop down box in the center allows you to specify the type of join you want to create, INNER, OUTER, EXCEPTION or CROSS join. Once you have selected a left table, a right table and a join type, pressing Add Join presents you with the following screen.
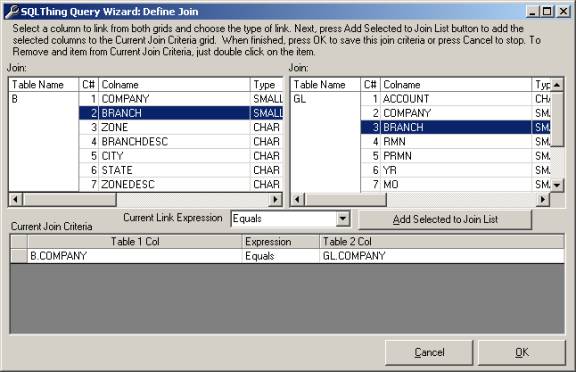
This screen allows you to pick which columns should be used in the join. Note that clicking a column from the list on the left causes SQLThing to find the corresponding column in the list on the right. SQLThing will use the column matching rules defined in the Options screen in finding column matches. For example, if you use a naming convention where the first two letters identify the file and the remaining letters identify the column, SQLThing can be instructed to always skip the first <n> chars when attempting to match columns. Once you have a column selected on the left and right lists, use the Add Selected to Join List button to cause the equation to be added to the list of current join criteria. In the screen shot above, I have already selected that B.COMPANY should equal C.COMPANY and am about to add criteria for B.BRANCH equaling C.BRANCH. Once all of your criteria are added, press OK to return to the join screen.
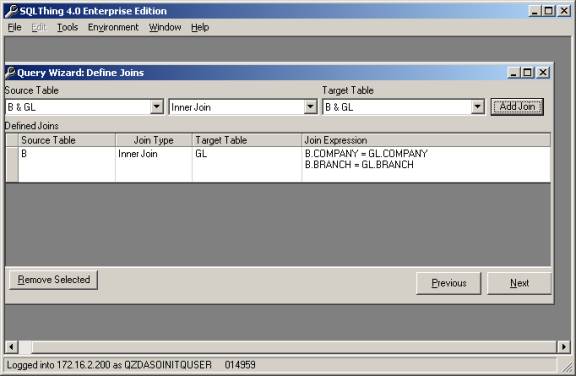
Note that the screen now shows the join that I have added. Also, the contents of the drop down lists have changed. Instead of seeing the files B and GL, we now see an entity called B & GL. This is because you have now defined the join of B and GL, so any other joins you might create will be joined to the join B & GL, not to just B or just GL. If there are other tables that need to be joined, the Next button will be disabled until you finish specifying all joins in your query. If all tables are joined, the Next button is enabled and you may continue to the layout/criteria screen. Layout/Criteria Screen
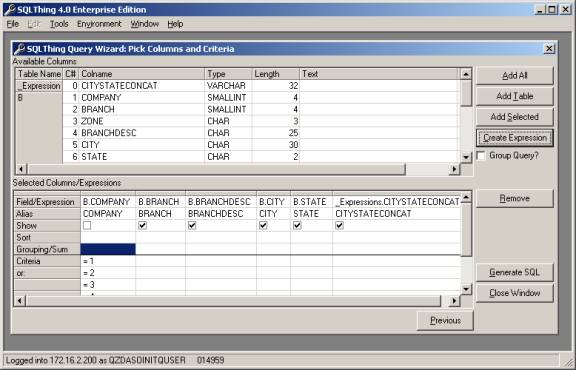
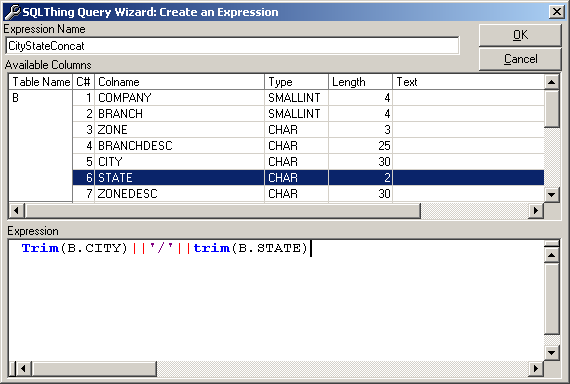
Above is a screen capture of the Pick Columns and Criteria screen of the query wizard. From this screen, you can select columns that you want to display, create expressions and set selection criteria for your query. To select a column, simply double click on the column to make it appear in the Selected Columns/Expressions list. Once several columns are selected, you can re-order the selections by grabbing the small gray border at the top of a column and moving the column to the desired position. Toggling the Show check box indicates whether a column is in the select list or is just used for selection criteria. In the screen shot above, the COMPANY column is not going to be in the select list, it will just be used as criteria. Note that you can enter criteria simply by typing into a criteria cell. If you do not include an equation operator, (= , <, >, <=, >=) then SQL will assume that you are entering match, ‘=’, criteria. SQLThing will automatically fix up your criteria into the desired data type. i.e. if the column is a char data type, SQLThing will place the single quote characters around your entry. Pressing the Create Expression button allows you to create an expression. The following screen is displayed.
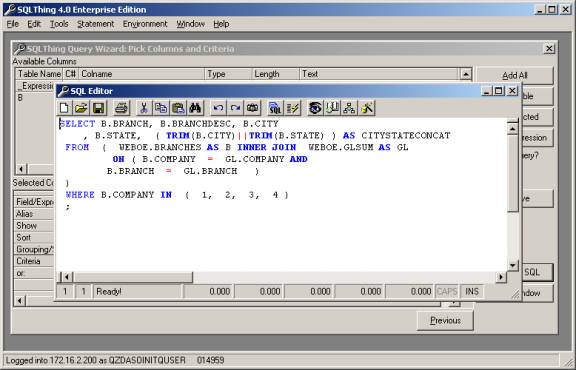
From here, you can type in your expression and give the expression a column alias. When you press OK, SQLThing will send the expression to the AS/400 to validate the syntax. If the expression is not valid, the error message from the AS/400 will be shown to you. If the expression is valid, it will be added to the list of available columns. The Remove button allows you to remove a column from the list of criteria/display columns. Finally, when you have your query the way you want it press the Generate SQL button. This causes SQLThing to generate the SQL for the graphically represented query and place it into a new editor window. SQLThing also places the query into the Windows Clipboard for pasting into other applications. The following screen shot shows the query that SQLThing generated for the selections that I made. If the query is not what I want, I can go back to the wizard and make adjustments and regenerate the query.
|
||